Why Handbuilding Isn’t Just for Beginners
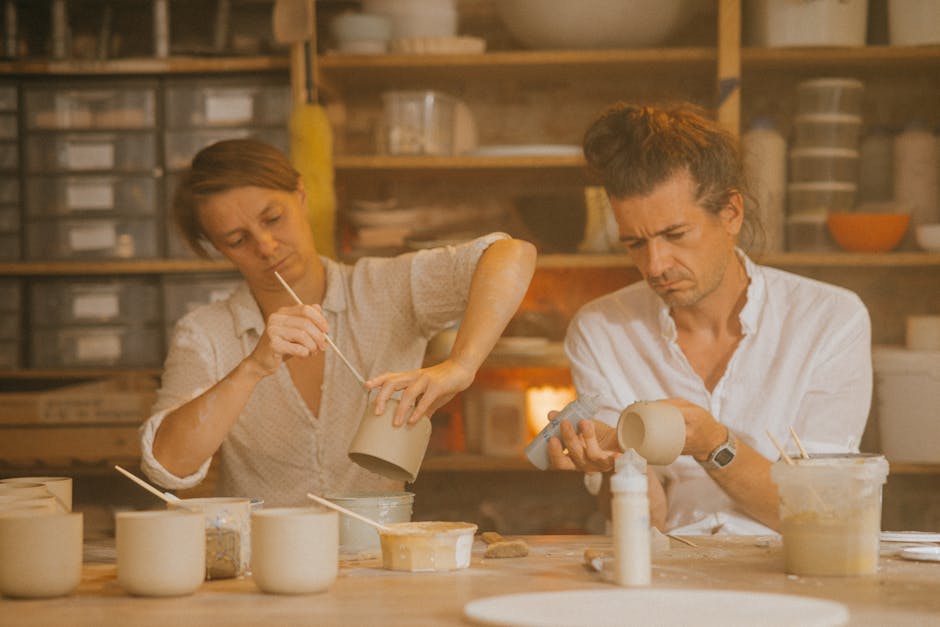
There’s something quietly powerful about forming clay with your hands no spinning wheel, no machinery. Just you, some earth, and time. That’s the appeal of handbuilding. It’s tactile. Personal. It pulls you into the process, where every mark and curve holds intention. For newcomers, it’s approachable. For seasoned artists, it’s liberating.
Mastering handbuilding doesn’t just build technique it builds confidence. You’re not limited by the shape a wheel forces on you. Want to make a jagged sculpture that leans seven degrees left? Go for it. Want to feel every pinch, every seam, every layer as it forms beneath your fingers? That’s the point. Once you get the hang of it, you’ll start thinking less like a rule follower and more like a builder of ideas.
More and more contemporary ceramics artists are leaning into the slowness of handbuilding. Not because it’s trendy, but because it forces you to pay attention. Each step is deliberate. Each decision shapes the outcome. When everything else buzzes by, handbuilding asks you to wait. That’s where the magic gets made.
Pinching
Pinching is where most journeys with clay begin and for good reason. It’s the simplest technique, using only your fingers, but don’t let that fool you. Pinching isn’t just kid stuff. In practiced hands, it’s a flexible, precise method that offers direct control over shape, texture, and wall thickness.
To start: take a ball of clay and press your thumb into the center, turning and squeezing the walls as you go. That’s it. From there, you can branch into endless forms. Cups are a great foundation useful, forgiving, and fast. Figurines and seed pod shapes let you get more sculptural without overcomplicating the process.
The real power comes in feel. Pinching forces you to pay attention to the tension between fingers, the resistance of the clay, the slight give as moisture and time affect plasticity. You learn how thick a wall needs to be to stand, how thin it can be before it slumps. You’re sculpting by touch. And that’s where handbuilding starts to sing.
Surface Design: Getting Creative with Texture
Adding surface texture can elevate even the simplest handbuilt form into something visually striking and deeply personal. Texture is more than decoration it can emphasize form, suggest movement, or tell a story.
Tools That Transform Your Clay
These simple methods and tools can dramatically affect the final look of your work:
Carving: Use loop tools, ribbon tools, or even improvised items like toothpicks to engrave patterns into the surface.
Scoring: While traditionally a method for joining pieces of clay, scoring can also add dynamic marks and lines when used as a design element.
Pressing: Open up endless possibilities by pressing objects into the clay surface for instant texture. Shells, lace, stamps, and even leaves can leave intricate imprints.
Found Objects = Unique Patterns
Skip the store bought texture tools some of the best ideas come from your surroundings:
A section of burlap for a woven effect
A bottle cap to stamp concentric circles
A broken piece of wood or bark for unexpected linear textures
Be curious. If it can make a mark, it can be a texture tool.
Inspiration Beyond Clay
Surface design doesn’t have to stay within the boundaries of ceramics. Textile artists, in particular, understand the language of pattern, rhythm, and repetition principles that directly apply to handbuilt clay work.
Take cues from other artistic disciplines:
Stitching patterns in fabric can inspire line work in clay
Weaving and embroidery techniques translate into subtle surface motifs
For more visual ideas, explore: Textile Art Techniques That Contemporary Artists Swear By
Whether you’re working with functional ware or sculpture, giving attention to surface design can make your work stand out both visually and conceptually.
Timing Is Everything
When working with clay, timing isn’t just helpful it’s critical. Clay moves through various stages as it dries, and knowing how to work with each stage can make or break a handbuilt piece.
Understanding the Drying Stages
There are two key stages to pay close attention to:
Leather Hard: The clay has dried slightly, is firmer to the touch, but still retains moisture. At this stage, it’s ideal for:
Trimming and refining forms
Attaching handles, spouts, or additional pieces
Carving or adding surface texture
Bone Dry: The clay is fully dry and light in color. It’s extremely fragile.
No alterations should be made at this stage
The work is ready for its first (bisque) firing
Key Timing Tips to Avoid Cracks and Warping
Maintaining control over the drying process is essential. Uneven or rushed drying invites structural problems. Here’s how to avoid common issues:
Dry slowly by covering your work with plastic for even moisture reduction
Avoid direct sunlight and drafts which can cause parts to dry too quickly
Let pieces rest at leather hard to strengthen before making final attachments
Score and slip consistently and allow attachments to firm up before handling
When to Trim, Air Dry, or Walk Away
Knowing when to take action and when to leave the clay alone saves time and frustration:
Trim when the walls are sturdy but still workable (leather hard)
Attach components when both pieces are at the same moisture level
Air dry gradually, adjusting humidity levels with plastic covers
Being intentional with timing allows for better craftsmanship, fewer repairs, and a smoother firing process.
Finishing + Firing
When it comes to finishing handbuilt ceramics, the process can make or break the final piece. Glazing, firing, or cold finishing each option has its own logic. Here’s the no fluff breakdown.
Basic Glaze Tips for Handbuilt Work
Handbuilt pieces usually have more texture and slight irregularities. Embrace that. When glazing, watch out for pooling in crevices and thinner application on corners. Dip glazing can get messy fast brushing offers better control. Wipe the bottom clean before firing unless you want your piece fused to the kiln shelf. And always test: clay bodies, glaze thickness, and firing temperature all matter more than you think.
Bisque vs. High Fire What Changes and How to Adapt
Bisque firing (low fire) hardens the clay without vitrifying it. It’s porous, easier to glaze, and safer for early stage handling. High fire, on the other hand, matures the clay, often enhancing strength and durability but it also risks warping thinner handbuilt forms. If you go high fire, design with that stress in mind: even walls, slow drying, and supportive structures help it survive. Use a clay body meant for the temperature range you’re working in, or it could bloat or slump.
Cold Finishes for Sculptural (Non Functional) Pieces
If the piece isn’t meant to hold food, water, or endure wear, skip the glaze. Cold finishes give you freedom. Acrylics, oxides, pastels, even waxes or metal leaf use what works. Just make sure the surface is sealed if needed and test compatibility over time. This route is ideal for artists leaning into form and texture instead of function. No firing schedule, no glaze surprises just direct expression on a solid, fired base.
Do your test tiles. And take notes. Surface is invention, not afterthought.
Where to Look for Inspiration
Inspiration isn’t always about staring at other pots it can come from the shape of tree bark, the curve of a stairwell, or the quiet rhythm of empty space. Nature still tops the list for many handbuilders, especially those interested in organic, raw texture. Soft folds of clay can echo seashells or wind shaped stone, and leaf imprints never go out of style.
Then there’s architecture. Brutalist lines, minimalist symmetry, even the imperfect geometry of a handmade brick wall these give structure based builders a lot to chew on. If you’re making angular or modular forms, architecture offers a built in design language.
Minimalist design keeps pulling sculptors in because it forces attention back to form and surface. No clutter, no shortcuts just clay, space, and a message.
But the boundaries are shifting, thanks to contemporary ceramicists who mash clay with other materials or ideas. Think melting glazes that evoke fabric, or vessels built around wire, wood, or even light. Some artists blend handbuilding mode with textile thinking. If that interests you, check out more cross material ideas in these textile art tips.
Whether you lean natural, structural, or experimental, the trick is simple: look outside the studio. Ceramic inspiration lives everywhere if you’re actually looking.
Start Simple, Then Explore
Clay isn’t about racing to results. It’s about building muscle memory one pinch and slab at a time. You’ll get faster with practice, but speed isn’t the goal. Intention is. Every piece you build should teach you something, even if it falls apart halfway through. That collapse? It’s not a failure. It’s data.
Some of the best ceramic work comes from leaning into limitations. A crack, an unexpected slump, a texture that doesn’t behave all of it shapes your future decisions. Keep notes. Take photos. Treat your studio sessions like field research. Let ideas come from how the clay moves, not just from sketches in a notebook. Over time, your process becomes the idea factory not the other way around.
 Ismael Stansburyear has opinions about art exhibitions and reviews. Informed ones, backed by real experience — but opinions nonetheless, and they doesn't try to disguise them as neutral observation. They thinks a lot of what gets written about Art Exhibitions and Reviews, Artist Spotlights, Techniques and Tutorials is either too cautious to be useful or too confident to be credible, and they's work tends to sit deliberately in the space between those two failure modes.
Reading Ismael's pieces, you get the sense of someone who has thought about this stuff seriously and arrived at actual conclusions — not just collected a range of perspectives and declined to pick one. That can be uncomfortable when they lands on something you disagree with. It's also why the writing is worth engaging with. Ismael isn't interested in telling people what they want to hear. They is interested in telling them what they actually thinks, with enough reasoning behind it that you can push back if you want to. That kind of intellectual honesty is rarer than it should be.
What Ismael is best at is the moment when a familiar topic reveals something unexpected — when the conventional wisdom turns out to be slightly off, or when a small shift in framing changes everything. They finds those moments consistently, which is why they's work tends to generate real discussion rather than just passive agreement.
Ismael Stansburyear has opinions about art exhibitions and reviews. Informed ones, backed by real experience — but opinions nonetheless, and they doesn't try to disguise them as neutral observation. They thinks a lot of what gets written about Art Exhibitions and Reviews, Artist Spotlights, Techniques and Tutorials is either too cautious to be useful or too confident to be credible, and they's work tends to sit deliberately in the space between those two failure modes.
Reading Ismael's pieces, you get the sense of someone who has thought about this stuff seriously and arrived at actual conclusions — not just collected a range of perspectives and declined to pick one. That can be uncomfortable when they lands on something you disagree with. It's also why the writing is worth engaging with. Ismael isn't interested in telling people what they want to hear. They is interested in telling them what they actually thinks, with enough reasoning behind it that you can push back if you want to. That kind of intellectual honesty is rarer than it should be.
What Ismael is best at is the moment when a familiar topic reveals something unexpected — when the conventional wisdom turns out to be slightly off, or when a small shift in framing changes everything. They finds those moments consistently, which is why they's work tends to generate real discussion rather than just passive agreement.