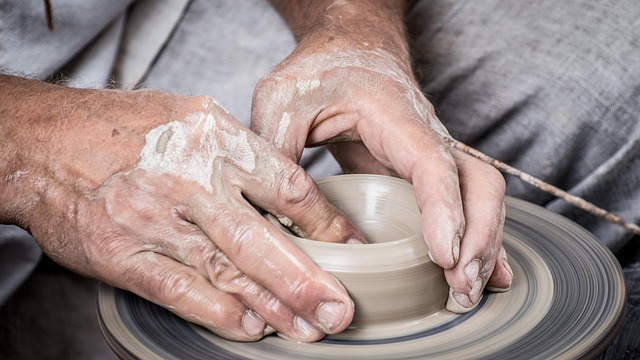
Clay has been around longer than written language, and for good reason. It’s simple, tactile, and endlessly adaptable. From ancient pottery to modern sculptures, this humble material has stood the test of time as both a tool for function and expression.
For beginners, clay is forgiving. It’s soft, moldable, and responds well to instinct. You don’t need fancy tools to get started—your hands and a little patience go a long way. It’s also one of the few mediums where mistakes can be worked back into the process. Didn’t like how something turned out? Smash it and try again.
Choosing the right clay depends on what you want to make. Air-dry clay is great for casual projects that don’t need kiln firing. It’s easy to use and dries naturally. Polymer clay is baked in a standard oven and is perfect for small, detailed items like jewelry or miniatures. Ceramic clay is the real deal—used for pottery or anything meant to be fired and glazed—but it does require access to a kiln and more prep.
No matter which you pick, clay doesn’t ask for perfection. It welcomes play, process, and trial. That’s what keeps people coming back to it, thousands of years later.
To get into sculpting, you don’t need a studio full of fancy gadgets. A solid starter kit includes the basics: a sturdy wire cutter for your armatures, loop tools to carve and refine, and modeling sticks to shape details. These tools do most of the heavy lifting and are enough to take your clay ideas from blob to impressive.
If you’re ready to step it up, there are a few upgrades that make things smoother. A turntable is a simple add-on that lets you spin your piece while you work—big help for symmetry and convenience. Texture stamps give your surfaces more interest without much effort. Heat tools? Game-changer for smoothing surfaces or quick fixes.
Setting up at home doesn’t take much either. All you need is a flat, clean workspace, good lighting, and some airtight containers if you’re working with polymer or oil-based clays. Keep it minimal. Stay organized. You’ll get more done with less clutter.
Before you start sculpting, your clay needs conditioning. That means kneading it until it’s pliable and smooth, with no hard spots or bubbles. Cold or crumbly clay won’t behave well, so take the time. Roll it, stretch it, fold it. It should feel soft but firm, not sticky.
Next up: armatures. Think of them as the skeleton inside your sculpture. Use them when your piece is larger or has limbs or parts that stick out. Wire and aluminum foil are common choices. They give your clay structure and save material by filling space.
Start simple. Cubes, spheres, and cylinders are the backbone of most forms. Mastering these may seem dull, but they set you up for clean work and fewer headaches down the road. Don’t rush this part.
Symmetry is a big deal. It keeps characters from looking accidentally lopsided or broken. But sometimes you want imbalance—like a tilted head or an off-center pose—to give your piece life. Know when you’re breaking the rules, and make it intentional.
Common Clay Sculpting Mistakes (And How to Avoid Them)
When working with clay, understanding the common pitfalls can save time, effort, and a lot of frustration. Whether you’re a beginner or scaling up to more ambitious projects, staying aware of these issues is key to improving your results.
Skipping the Armature on Larger Builds
Large-scale clay builds need internal support. Skipping the armature leads to structural instability, sagging, or collapse — especially during drying or firing.
- For anything beyond small figures, use wire, wood, or aluminum armatures
- Supports reduce cracking and help maintain proportion
- An armature also lets you sketch forms in 3D before adding details
Overworking Wet Clay
Clay becomes fragile if it’s manipulated too much while wet. Overhandling can compromise the form and weaken the material.
- Touch the clay only when necessary during early shaping
- Allow time between adjustments to let the clay rest
- Use tools with intent rather than constantly reshaping by hand
Inconsistent Wall Thickness
Wall thickness matters more than many think. Inconsistent thickness causes uneven drying, which leads to cracks or explosions in the kiln.
- Aim for uniform thickness throughout the piece
- Use calipers or simple finger checks to measure consistency
- Thicker areas dry slower, so adjust drying time or hollow them out
Skipping the Planning Phase
Freehand sculpting can be freeing, but a total lack of planning often leads to frustration. Even a loose game plan gives focus.
- Sketch your idea before starting, even roughly
- Consider size, posture, key features and balance points
- Planning helps reduce guesswork as the form develops
A successful clay project often hinges on what happens before and during the build. Understanding and avoiding these mistakes can dramatically increase the quality and lifespan of your sculpture.
Blocking out your sculpture is where structure begins. Don’t think detail yet. You’re setting up mass, posture, and intention. Start loose, even messy. You want your form to feel solid and functional before refining anything. Use big shapes like cylinders, cubes, and spheres. Keep shifting your view as you work. Walk around it if it’s physical. Rotate it constantly if it’s digital.
There are two main ways to build: additive and subtractive. Additive means you’re piling on material—clay, mesh, foam—until it takes shape. Subtractive is about carving away from a block. Both work, but the goal is the same: get your proportions locked in and your silhouette strong. Beginners often miss this and end up with what sculptors call the “lump effect”—a blob with no tension, no direction. Avoid it by thinking in planes and keeping your volume clean.
Proportions matter early. Don’t guess. Use reference, measure twice. Balance is visual and physical. If it looks like it might fall over, it probably will. Better to fix it now than after you’ve sunk hours into detail.
Lastly, negative space is not just leftover air. It’s part of the sculpture. Look at the gaps, the flow around the form. Your silhouette should read clearly from every angle. If the outline is unclear, the pose is probably weak. Solve that, and the rest gets easier.
Creating realistic textures in your vlog visuals can elevate a scene from decent to unforgettable. Whether you’re showing off a product, building atmosphere, or just making your footage feel more alive, texture matters.
Start with the basics: skin, fabric, metal, and wood. Skin benefits from soft, even lighting and high-resolution capture—think pores, small wrinkles, subtle coloring. Fabric texture often needs a back or side light to show folds and weave. Metal calls for contrast and reflections; catch highlights but control glare. Wood is all about grain—angle your light to rake across the surface, bringing out bumps and age.
Your toolkit doesn’t have to be fancy. Toothbrushes are solid for practical effects—think weathering props. Sponges, old T-shirts, makeup brushes, and cardboard edges each give different tactile looks when paired with the right light and paint. If you’re shooting B-roll, mix these physical hacks with good post-processing contrast tweaks.
Adding visual contrast boosts depth. Blend smooth and rough zones—a glossy tabletop next to a crumpled napkin, processed skin next to natural hair, shiny metal beside matte stone. These combos help your footage breathe.
Don’t ignore the small stuff. Loose threads on fabric, smudges on glasses, uneven paint—all of those make your visuals feel lived-in and real. Zoom in. Shoot close. Every detail tells a story.
Leveling Up: Practice and Artistic Growth
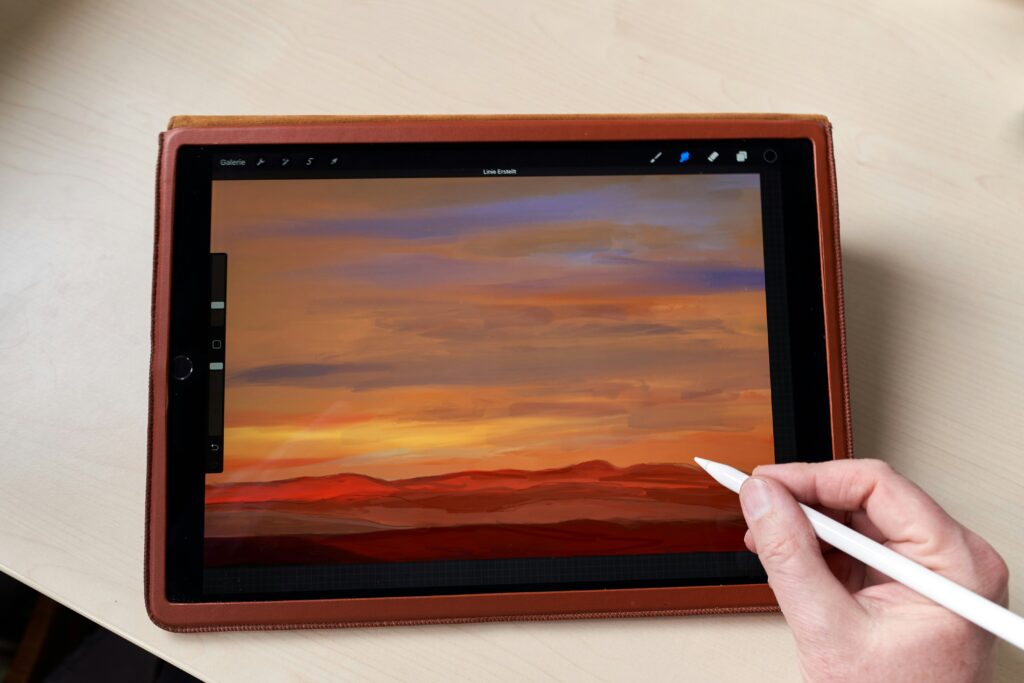
Improving your digital painting skills isn’t just about talent—it’s about consistently honing your craft. Whether you’re a beginner or a seasoned illustrator, building a strong foundation requires smart, ongoing effort.
Join Classes and Creative Communities
One of the most effective ways to grow as a digital artist is by learning with others. Surrounding yourself with fellow creators can help keep you inspired, challenged, and informed.
- Enroll in online courses or local art classes to get structured feedback
- Engage with online communities such as Discord groups, forums, or livestream chats
- Participate in digital painting challenges to stretch your creativity and discipline
Keep a Reference Library
A personal library of textures, shapes, and real-world forms becomes an essential resource with long-term use. It’s like building your own visual API, ready to assist you whenever creative blocks hit.
- Save high-resolution images of different surfaces and natural elements (wood, metal, fabric, skin, etc.)
- Create categorized folders for poses, lighting scenarios, and anatomy breakdowns
- Regularly update and revisit your library to keep it fresh and relevant
Routine Practice Makes Precision
Intentional small exercises add up—and they’re crucial for mastering technique. Don’t wait for a full project to work on your skills.
- Dedicate time each week to simple shape exercises or brush control drills
- Try repainting elements in various lighting conditions to understand form better
- Use short warm-up sessions to improve hand-eye coordination and precision
Additional Resource
Want to lay a stronger foundation? Check out this article for a deeper dive: Digital Painting 101: Tools, Techniques, and Workflow
Finishing a clay sculpture doesn’t have to be complicated, but skipping steps can cost you all your hard work. Start with the right drying and curing method based on your clay type. Air-dry clays need time and airflow—no ovens, no rushing. Polymer clays get baked at low, consistent temperatures according to the brand’s specs. Ceramic clays must be bone-dry before hitting the kiln. No exceptions.
Once your piece is cured, get into surface refinement. Sanding matters whether it’s a smooth finish or just knocking off rough edges. Use fine-grit sandpaper and take your time. Water sanding works great with polymer clay and helps avoid scratching. After sanding, you can polish with a soft cloth or buffing wheel, especially for high-gloss finishes.
Painting comes next. Acrylics work on most cured clays and dry fast. Build up in layers if you want depth. Sealing is non-negotiable if your piece will be handled. Use a sealant designed for your clay type—shiny, matte, or somewhere in between.
As for displaying your work, keep it simple but secure. Lightweight pieces do well on small stands or inside shadow boxes. Heavier sculptures need stable surfaces and maybe a discreet mount. Avoid direct sunlight and humidity to keep your piece looking sharp for the long haul.
Practice Over Perfection
Vlogging, much like sculpting, isn’t about nailing it on the first try. It’s a grind. Most creators don’t come out the gate with clean cuts, perfect lighting, or razor-sharp edits. That’s fine. In fact, that’s expected. The best vloggers know it’s not about perfection—it’s about the reps.
Texture and form take time. Whether you’re finding your voice or dialing in your editing flow, don’t rush it. Consistent progress beats bursts of polish. Viewers care less about how flawless your video looks and more about how real it feels.
And here’s the real kicker—creating shouldn’t be just about getting the final product right. It’s about what you learn by doing. Every vlog you shoot, script you write, or clip you trim teaches you something new. Sometimes the rough cuts tell you more than the polished ones. Stick with it.
 Anthony Jacksonavarro is the kind of writer who genuinely cannot publish something without checking it twice. Maybe three times. They came to creative inspiration and ideas through years of hands-on work rather than theory, which means the things they writes about — Creative Inspiration and Ideas, Contemporary Art Insights, Techniques and Tutorials, among other areas — are things they has actually tested, questioned, and revised opinions on more than once.
That shows in the work. Anthony's pieces tend to go a level deeper than most. Not in a way that becomes unreadable, but in a way that makes you realize you'd been missing something important. They has a habit of finding the detail that everybody else glosses over and making it the center of the story — which sounds simple, but takes a rare combination of curiosity and patience to pull off consistently. The writing never feels rushed. It feels like someone who sat with the subject long enough to actually understand it.
Outside of specific topics, what Anthony cares about most is whether the reader walks away with something useful. Not impressed. Not entertained. Useful. That's a harder bar to clear than it sounds, and they clears it more often than not — which is why readers tend to remember Anthony's articles long after they've forgotten the headline.
Anthony Jacksonavarro is the kind of writer who genuinely cannot publish something without checking it twice. Maybe three times. They came to creative inspiration and ideas through years of hands-on work rather than theory, which means the things they writes about — Creative Inspiration and Ideas, Contemporary Art Insights, Techniques and Tutorials, among other areas — are things they has actually tested, questioned, and revised opinions on more than once.
That shows in the work. Anthony's pieces tend to go a level deeper than most. Not in a way that becomes unreadable, but in a way that makes you realize you'd been missing something important. They has a habit of finding the detail that everybody else glosses over and making it the center of the story — which sounds simple, but takes a rare combination of curiosity and patience to pull off consistently. The writing never feels rushed. It feels like someone who sat with the subject long enough to actually understand it.
Outside of specific topics, what Anthony cares about most is whether the reader walks away with something useful. Not impressed. Not entertained. Useful. That's a harder bar to clear than it sounds, and they clears it more often than not — which is why readers tend to remember Anthony's articles long after they've forgotten the headline.